Angel Food Cake Recipe
Hi there, welcome to the Lovingly Whisked Recipe Book! Today's recipe is Angel Food Cake. These sweet, delicious summertime cakes are a little time-consuming, but easier than you think! Let's make it!
RECIPES
2/16/20265 min read
What you'll need:
1 3/4 cup granulated sugar
1 cup cake flour*
12 egg whites
1 1/2 teaspoon cream of tartar
1/2 teaspoon sea salt
1 teaspoon vanilla
What you'll do:
Sift cake flour and 3/4 cup of the sugar.
In a separate bowl, add all 12 egg whites, cream of tartar, and salt. Whip this until soft peaks form.
Increase the speed and add 1 cup of sugar until you reach stiff peaks, and it looks glossy.
Gently fold in vanilla with a wooden or silicone spatula.
Sift the flour and sugar mixture into the egg whites - do this in 3 additions. You do not want to deflate the batter, but you want to make sure all the flour is incorporated.
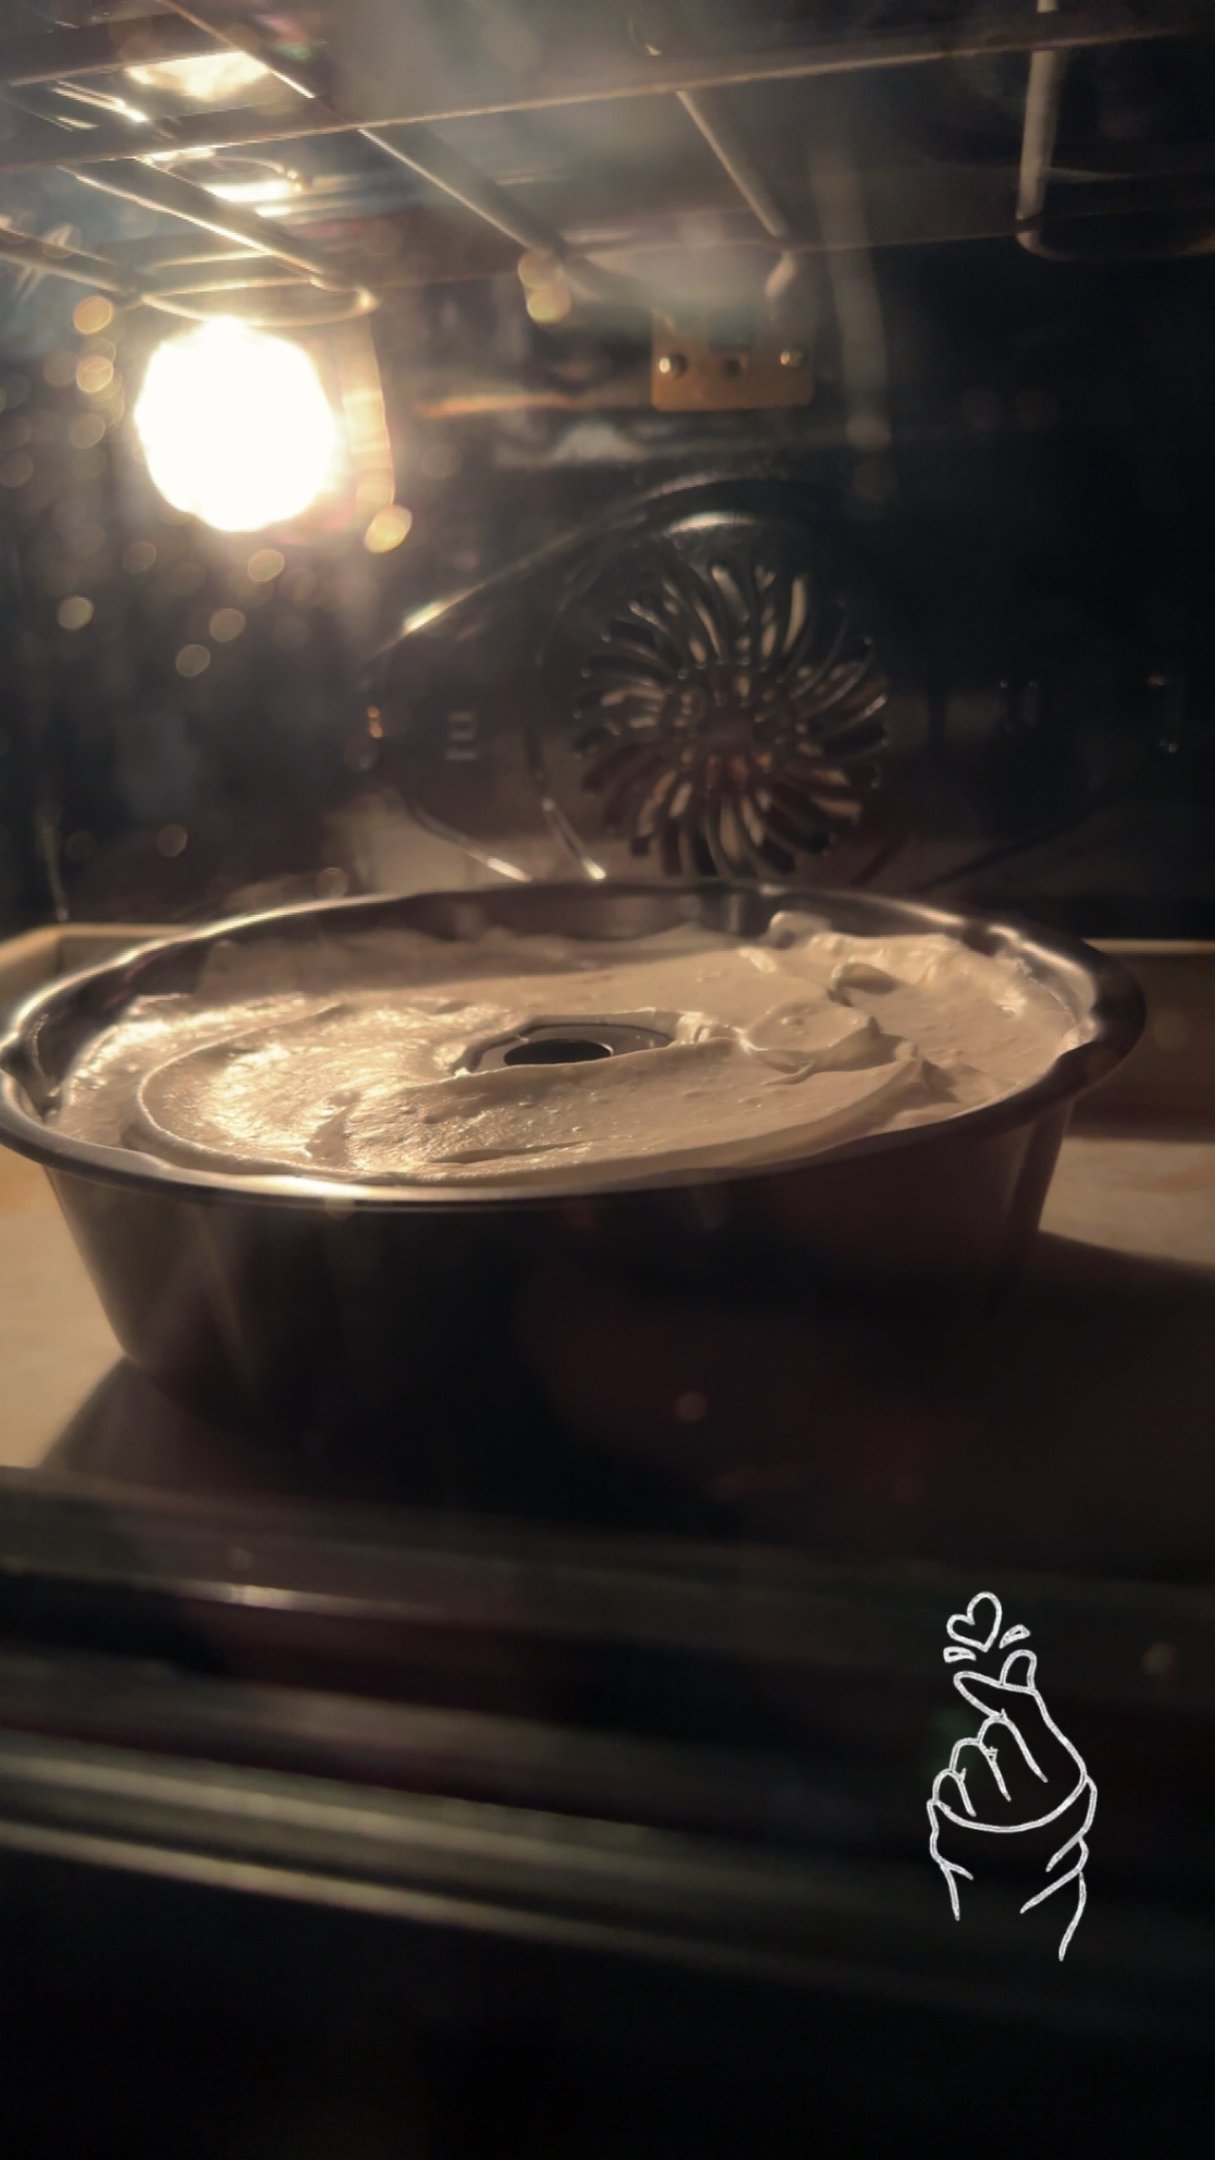
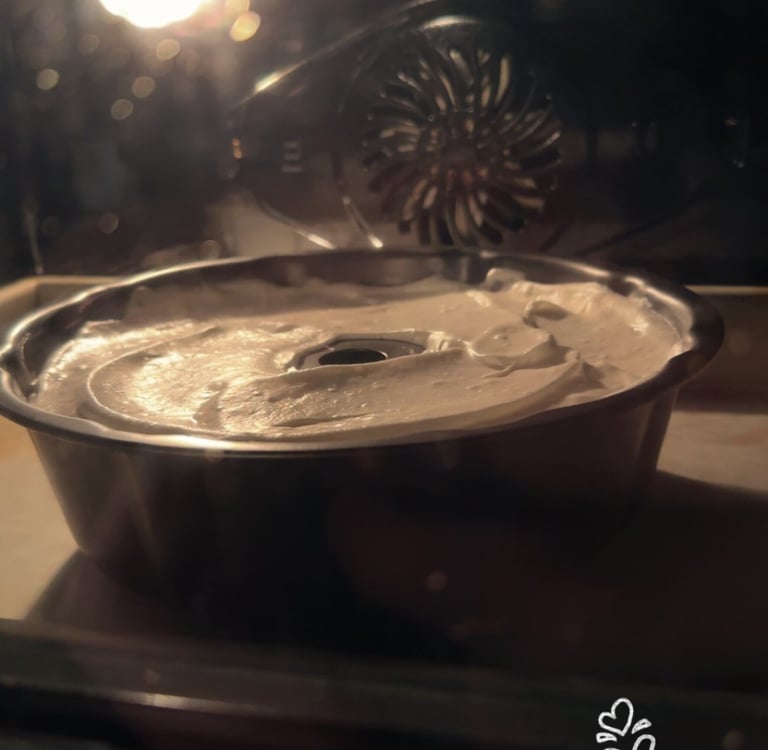
Gently pour the batter into the baking pan. I used a bundt pan; some use a tube pan. Whatever you use, do not grease the pan!
Bake at 350 degrees Fahrenheit for about 35-40 minutes, or until golden brown and the cake springs back from a gentle poke.
Remove the cake from the oven and turn the pan over to cool.*
Once cool, turn the pan back over and gently run a knife around the edges to help release the cake from the pan.
Turn the pan over once more to get the cake out of the pan.
Voila! You now have an Angel Food Cake!
A few baking tips before I continue:
If you do not have cake flour on hand, here is an easy fix: for every cup of all-purpose flour, remove 1 tablespoon of flour and replace it with 1 tablespoon of cornstarch! I did this when I made my angel food cake and had no issues with doing this. And it is so much easier to do this than have to stop everything to run to the store!
When separating your eggs, make sure they are straight out of the fridge. It is much easier to separate eggs when they are cold; the yolk doesn't bust as easily as room-temperature eggs. Once they are separated, let the egg whites reach room temperature before whipping into peaks.
More on eggs: It may seem like a hassle, but use a separate bowl to separate your eggs from the one you plan to mix in. This makes it easier on you if a yolk does happen to bust. Or, I've learned over the years, use a separate bowl to separate farm-fresh eggs. You never know when one may be a little yucky. If you know, you know.
I like to use a hand mixer versus the stand mixer to whip the egg whites. Personally, I feel like I have more control over whipping them and can ensure I get the edges really well.
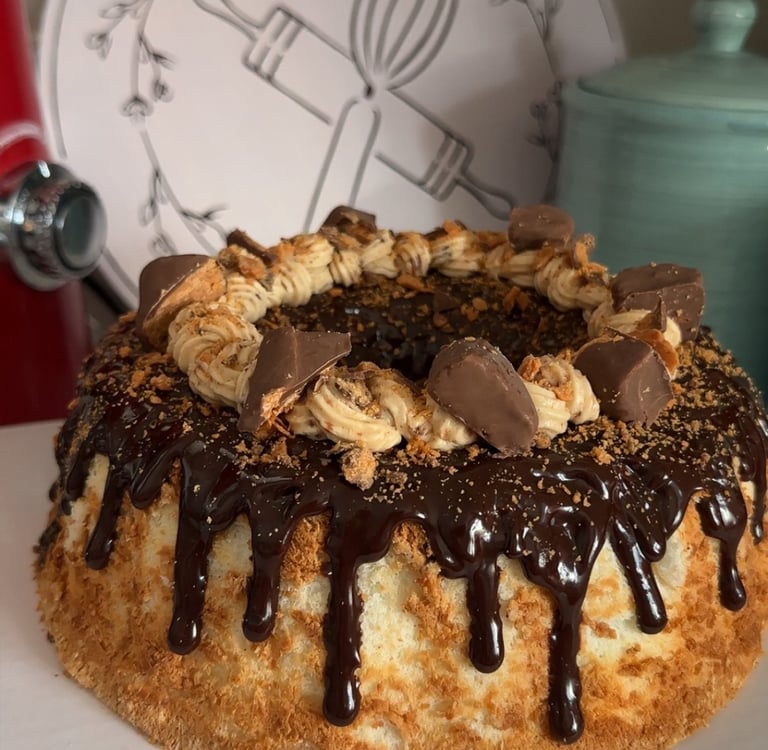
Now, for this angel food cake, I made it for a customer who gave me creative freedom, but wanted the Butterfinger candies incorporated somewhere in the cake. I decided to make a chocolate ganache to drip on the cake, spread Butterfinger crumbs into that while it was still wet, and then make a Butterfinger buttercream to add a little decoration to the top. This isn't your ordinary angel food cake, but my client said it was to die for! And her mouth was watering until they finally got to cut into the cake. Want to try it? Let's make that:
What you'll need:
For the ganache:
1/2 cup chocolate of your choice
1/3 cup of heavy cream
For the buttercream:
1 pound of powdered sugar
1 teaspoon vanilla
1 cup butter
1-2 tablespoons milk
1/4-1/2 cup of peanut butter
Butterfinger pieces
What you'll do:
For the ganache:
In a microwave-safe bowl, microwave the cream until it's starting to bubble, about 1-2 minutes.
Pour the cream over the chocolate. Ensure all of the chocolate is submerged, and let it sit for another couple of minutes.
Gently stir until combined and silky smooth.
Pour into a drizzle bottle or piping bag and let the ganache cool for about 10 minutes.
Do a test drip before adding to the cake to check consistency.
For the buttercream:
Cream the butter until it reaches a pale yellow color.
Add the powdered sugar and mix on low until the mixture is crumbly.
Add the vanilla, 1 tablespoon of milk, and 1/4 cup of peanutbutter. Mix until fully incorporated and desired consistency and taste.
Add the crushed Butterfinger pieces and mix until fully incorporated.
Decorate your cake!
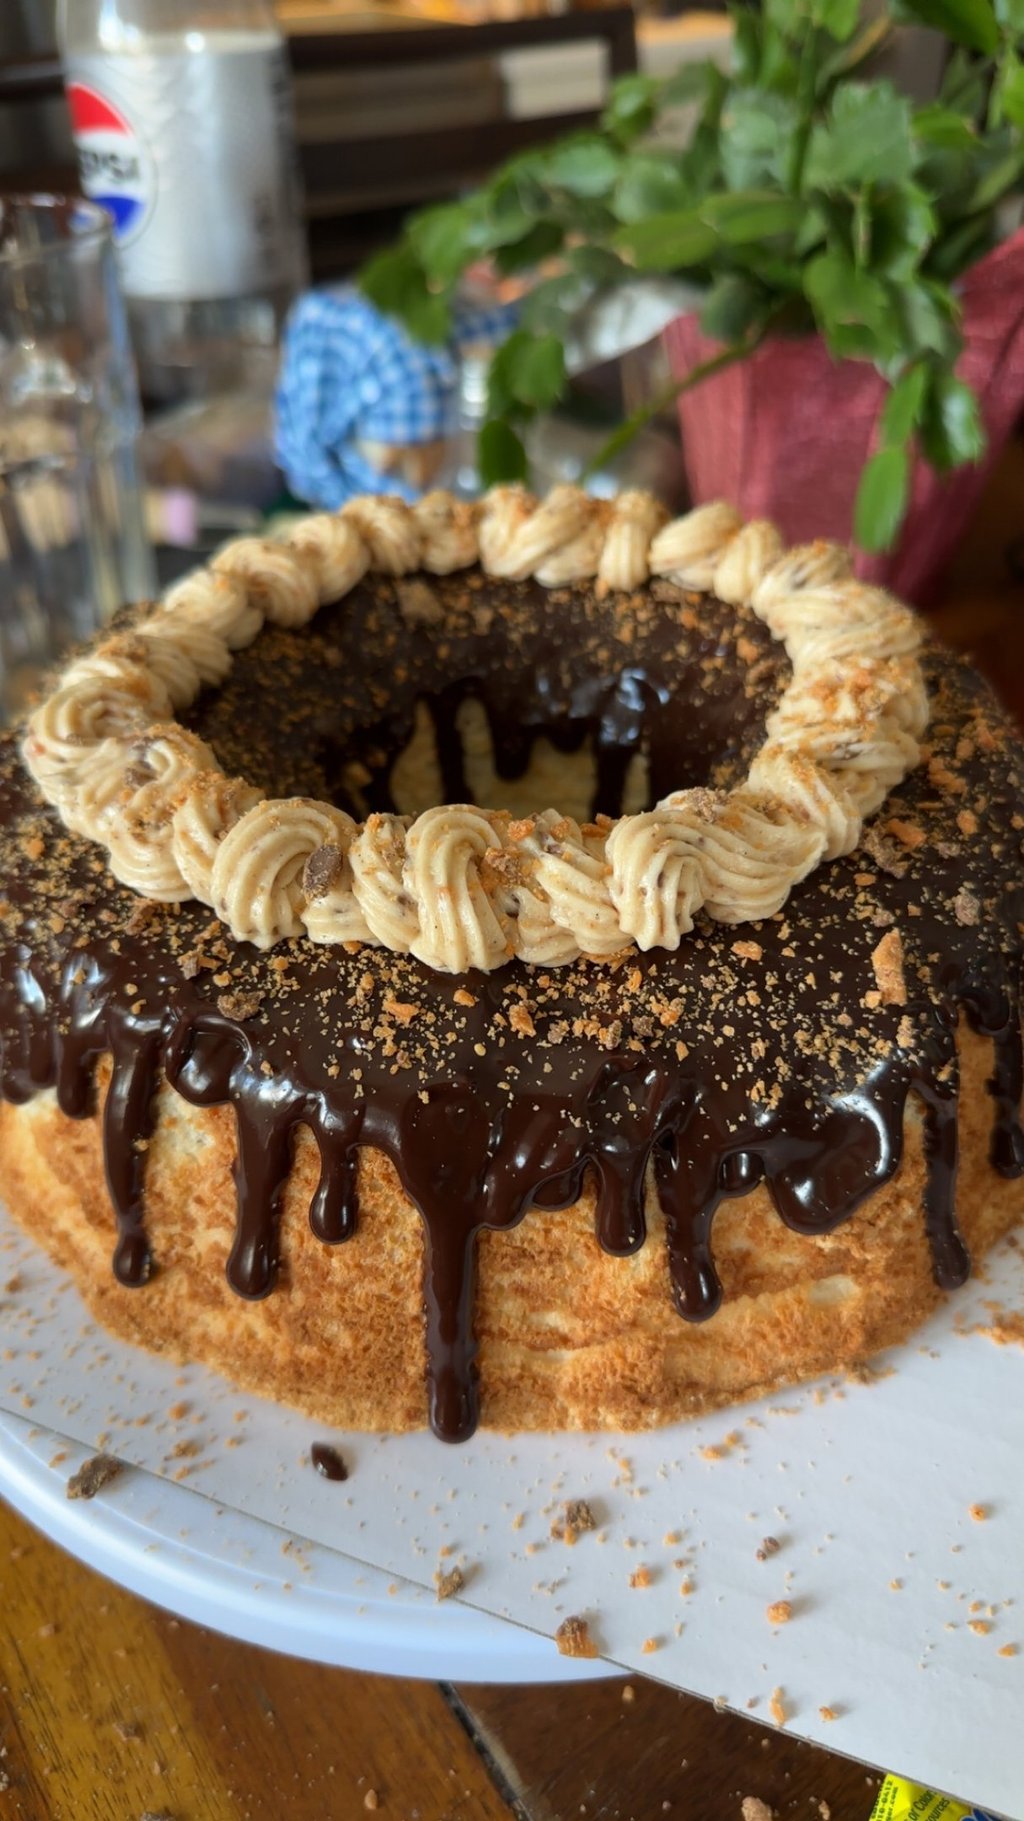
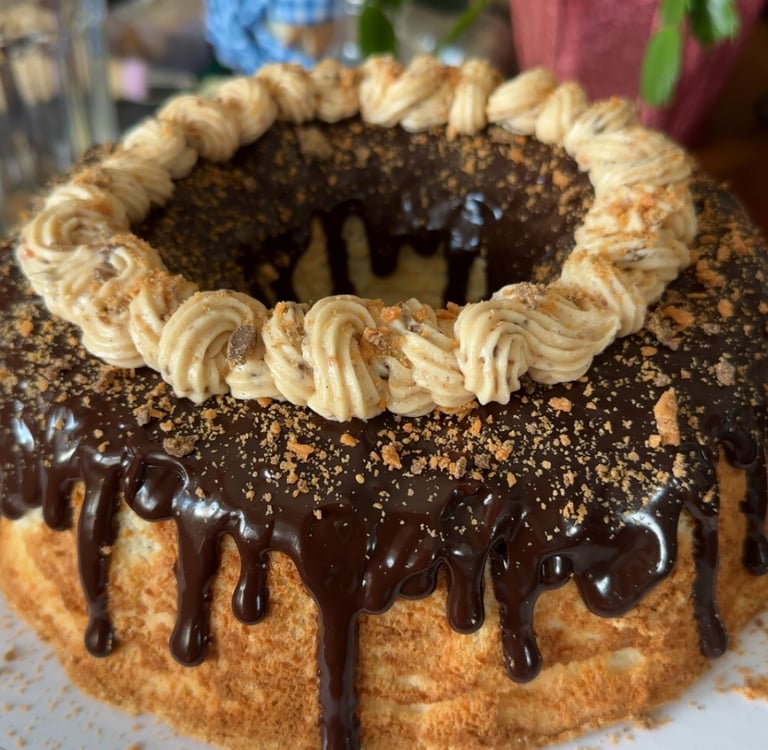
When I decorated my cake, I did the ganache first. I used milk chocolate chips for mine. I wanted to use dark chocolate to offset all the sweetness, but I didn't have any on hand. I used a piping bag and tested the ganache on the rim of a glass. I feel like that is the best way to test the consistency. Mine was perfect so it went straight onto the cake after the drip test. After it was on the cake, I had some candy crumbs that I sprinkled into the ganache to give it a little texture. I've learned in the past, it's easier to pipe buttercream onto a texture it can stick to. I have definitely had a mishap in the past where my buttercream slid straight off of some ganache. I let the ganache sit to dry for about half an hour before I piped the buttercream ring around the top. I used a textured tip- I'm not skilled enough to know all the different names or numbers of tips- and I did an alternating swirl around the top of the cake, as featured in the picture. Once I finished piping, I had more Butterfinger pieces and crumbs, so I sprinkled more crumbs onto the buttercream and added the pieces around the buttercream to give it a final touch. And there it was, in all of its unorthodox-ed beauty, ready to have its picture taken and get boxed up!
I was very intimidated by this cake, at first, but it was a lot easier than I ever thought it could be. And it came out better than I could have ever imagined. I plan to make another one soon to experiment with some different flavors and techniques. When mine came out of the bundt pan, the top wasn't as defined as I was hoping- which was fine because it got covered in ganache. So, I'm curious if I could just grease the bottom of the pan only. You're not supposed to grease the pan because the cake won't stick to the sides and bake like it is supposed to. I've also read that you shouldn't put anything into the batter. It won't bake properly, so, I want to test that as well. It will come in time. I assure you, I experiment on my slow weeks!
As always, more to come, so stay tuned! Check out the social media pages for exclusive shots from all of my bakes. All socials all linked down below. Follow my pages and subscribe to the website to be one of the first to know about a new story or recipe! There may be some discounts working their way into the emails of subscribers, so join the family while you can! Thank you so much for being here and making this cake with me! Want my personal story on this cake, check it out! See you for the next recipe! Take care! <3